A little something I found while digging through old projects.
This is an integrated 22W sealed sub with an 8" woofer. It also includes five more integrated 22W amplifiers to drive surround sound speakers.
I built this over a year ago now and it's held up pretty well in daily use. So far it's acted as the mini home cinema/PC speakers in my living room. The amplifiers used are kits from 41Hz.com and are based on the TA2021B Class T dual 22W amplifier (it's really a just proprietary class D amp made by a company known by Tripath - Though rumour has is... they were acquired by Cirrus in 2007 due to bankruptcy...?).
The build is pretty straight forward. I calculated the box dimensions from a free bit of software I found on-line. It's quite simple to work out as long as you have the woofer specs.
The woofer used is one of those odd brand kevlar 8" woofers I found down a local AV electronics store.
Started off by cutting up enough MDF, 12mm thick, for a 270x270x270mm box.
Drilled, glued and screwed it all together...
Accuracy of hand tools are only so good so had to plane the edges...
Added a little wood filler around the joins to make sure it was well sealed...
With a scrap bit of aluminium, I put together a plate to hold all the electronics.
Using this plate as a template, I marked out where it would go on the box and cut it out with a router.
Filed and sanded in some bevels to make it look nice...
I tapped the plate so it could be held on tightly with twelve M5 screws...
To assemble the electronics was quite easy afterwards...
This is the amplifier, there are three modules in total, each with two 22W channels if driving 4 ohms. You'll notice the thermal paste present to give thermal contact to the metal plate. This amp is extremely efficient, so much so that it is always powered. The standby draw is a couple milliamps per channels and always stays on for when it's needed. In fact a mute circuit would have drawn more...
The entire thing is powered by a 12V switching supply I have from an old LCD monitor. Currently limited to about 30W with all channels combines because of the gain settings on each amp don't allow me to go higher with line level audio.
It's still loud as hell! I mean REALLY LOUD to the extent that you can feel it in your chest! A bit like club or concert speakers do.
There is a small Op Amp circuit that allows you to change the gain of the sub woofer channel as well as switch between having it separately sourced or mixed from the left and right channels if using small front speakers. I did have a crossover on the sub and front channels but it made very little difference to the perceived sound and just added complexity. My speakers have natural roll-offs that meet together somewhat well enough anyway.
Either way, I couldn't hear the difference...
The finished product.
...and to this day, I have yet to add actual speaker terminals!...
Now time for the woofer mounting. Drew a circle and again routed it out...
These are some cheap speaker spikes I got on ebay. They are adjustable and just screw in...
I went with some speaker cloth to cover this part, just to make it look interesting and also does well at hiding the seam of the woofer panel...
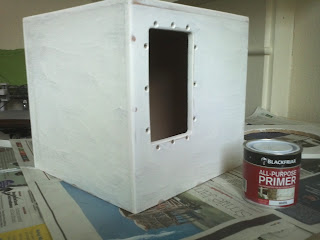
Lots of sanding and painting later, I had a nice shiny white box ready to be colour coated...
I have since painted the speaker a deep red. It looks decent, my painting skills aren't amazing but the design came out surprisingly symmetrical seeing as I didn't use a table saw to cut the stock.
The performance is fantastic. Bass isn't the loudest for the power rating but is very clean and well balanced. The size it's great and portable enough for a student! I've looked at other options and ways to expand on it but have yet to find anything better.
I have been toying with the idea of transducers (aka bass shakers) to add to the system but not sure if it's worth it...
I've been meaning to measure the characteristics of this subwoofer but haven't had the time, gear or know how to do it. There is a need an anechoic chamber or large open space to do it. Guessing it might look a little suspicious sitting in a park with lots of electronics everywhere making strange noises.
All in all, the build took about a week or two including painting and sanding. Total cost is around £90 - £130 I'd say including amps, wood, speaker, hardware, paint...
Hoped you liked this build, it was one of my more fun projects because I had most parts and a clear path building it. No nasty surprises as such.


No comments:
Post a Comment